How to Configure Dask Labextension Cluster
The Dask JupyterLab extension package provides a JupyterLab extension to manage Dask clusters, as well as to embed Dask’s dashboard plots directly into JupyterLab panes.
The ~/.config/dask/jobqueue-coffea-casa.yaml or /etc/dask/jobqueue-coffea-casa.yaml files are usually the default configuration files used for CoffeaCasaCluster:
Example of a file:
jobqueue:
  coffea-casa:

    # Dask worker options, taken from https://github.com/dask/dask-jobqueue/tree/master/dask_jobqueue
    cores: 4                 # Total number of cores per job
    memory: "6 GiB"                # Total amount of memory per job
    processes: null                # Number of Python processes per jobs
    worker-image: "coffeateam/coffea-casa-analysis:0.xx.xx"

    # Comunication settings
    interface: null             # Network interface to use like eth0 or ib0
    death-timeout: 60           # Number of seconds to wait if a worker can not find a scheduler
    local-directory: null       # Location of fast local storage like /scratch or $TMPDIR
    extra: []

    # HTCondor Resource Manager options
    disk: "5 GiB"          # Amount of disk per worker job
    env-extra: []
    job-extra: {}          # Extra submit attributes
    log-directory: null
    shebang: "#!/usr/bin/env condor_submit -spool"

    # Scheduler options
    scheduler-options: {}
    name: dask-worker
To configure a cluster that is launched using it, you should adjust the Dask configuration file, typically stored at ~/.config/dask/labextension.yaml or /etc/dask/labextension.yaml.
labextension:
  factory:
    module: 'coffea_casa'
    class: 'CoffeaCasaCluster'
    args: []
    kwargs: {}

    default:
      workers: 1
      adapt:
        minimum: 5
        maximum: 10
Users can edit kwargs: {} to change a CoffeaCasaCluster constructor directly (see more details in Coffea-Casa Setup Without Dask Labextention).
To get an address of scheduler that will be used during client connection, try right-clicking on the cluster in the sidebar:
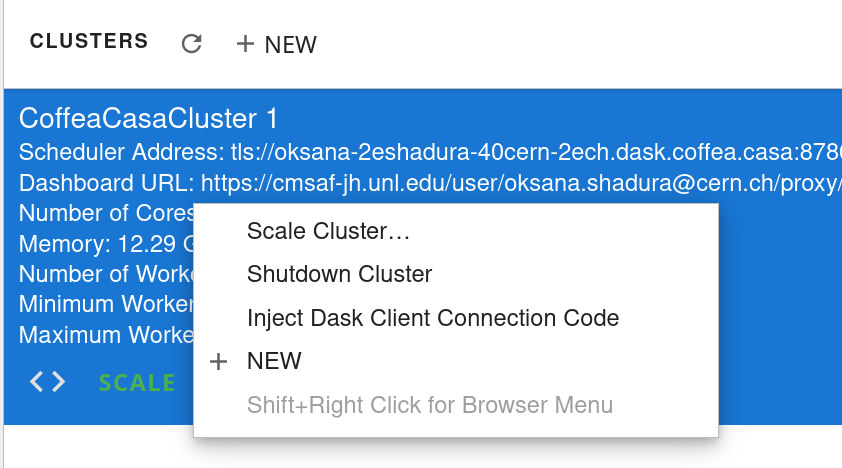
And then pressing Inject Dask Client Connection Code, as is shown in example below:
from dask.distributed import Client
client = Client("tls://oksana-2eshadura-40cern-2ech.dask.coffea.casa:8786")
client
or, more simply:
from dask.distributed import Client
client = Client("tls://localhost:8786")
client